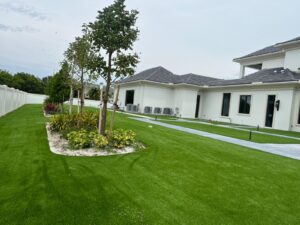
Synthetic turf, commonly known as artificial grass, has become increasingly popular for its durability, low maintenance, and year-round greenery. Whether for residential lawns, sports fields, or commercial spaces, synthetic turf installation follows a meticulous process to ensure a long-lasting, visually appealing result. Here’s a step-by-step guide on how synthetic turf is installed.
Step 1: Planning and Measuring
The installation begins with careful planning and measuring the area where the synthetic turf will be installed. This step involves assessing the site, determining the type and amount of turf needed, and identifying any potential obstacles, such as trees, rocks, or irrigation systems. Accurate measurements are crucial to avoid ordering excess material or running short. Additionally, checking for local regulations or guidelines regarding artificial turf installation is essential, especially in public or shared spaces.
Step 2: Site Preparation
Preparing the site is a critical step that involves clearing the area of existing grass, weeds, and debris. This may require the use of heavy machinery for larger areas. Once the site is cleared, the ground needs to be leveled and compacted to create a stable foundation. Proper drainage is essential to prevent water accumulation, so a base layer of crushed stone or gravel is often laid down. This layer is then compacted to ensure a smooth, even surface. Weed barriers are also installed at this stage to prevent unwanted growth beneath the turf.
Step 3: Laying the Synthetic Turf
With the site prepared, the next step is to lay the synthetic grass. The turf rolls are carefully unrolled and positioned to cover the entire area. It’s important to ensure that the turf fibers face the same direction for a uniform appearance. The edges of the turf pieces are then trimmed to fit the area precisely. To create a seamless look, seams between turf sections are joined using special adhesive and seam tape. Once all the pieces are in place, the turf is anchored around the perimeter using landscaping stakes or nails.
Step 4: Securing and Infill Application
Securing the turf and applying infill is crucial for stability and longevity. The turf is secured by nailing or stapling it to the base, ensuring it remains in place. After securing the turf, infill material, such as silica sand or crumb rubber, is spread evenly over the surface. Infill helps weigh the turf, support the turf fibers, and provide a cushiony feel underfoot. The infill is brushed into the turf using a power broom or rake, ensuring it penetrates deep into the fibers. This step may be repeated several times to achieve the desired level of infill.
Step 5: Final Grooming and Inspection
The final step involves grooming the synthetic turf and conducting a thorough inspection. The turf is brushed again to ensure the infill is evenly distributed and the fibers stand upright. This grooming process enhances the appearance and ensures a natural look. The installation is inspected for imperfections, such as uneven seams or loose edges, and necessary adjustments are made. Once the inspection is complete, the synthetic turf is ready for use, providing a lush, low-maintenance landscape for years.
In conclusion, installing synthetic turf involves meticulous planning, site preparation, precise turf laying, securing and infill application, and final grooming. Each step is essential to ensure a durable, attractive, and functional artificial lawn that withstands the elements and heavy use. With proper installation, synthetic turf can transform any area into a vibrant, green space that requires minimal upkeep.
Artificial Grass & Paver Pros
(727) 513-4240

